Monday, September 7, 2015

Replace air con micro/pollen filter on bmw f10 5 series

Replaced the air con pollen microfilter again @39500km.

Most guides online are for left-hand drive cars. This is for right hand drive cars, which is almost similar.

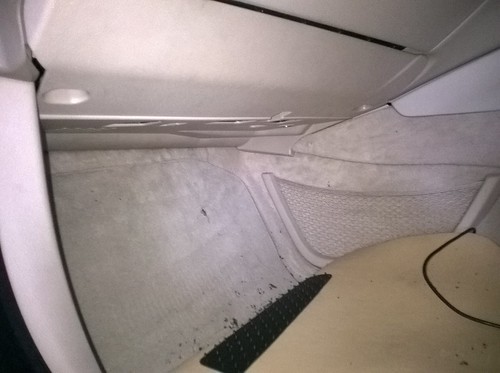
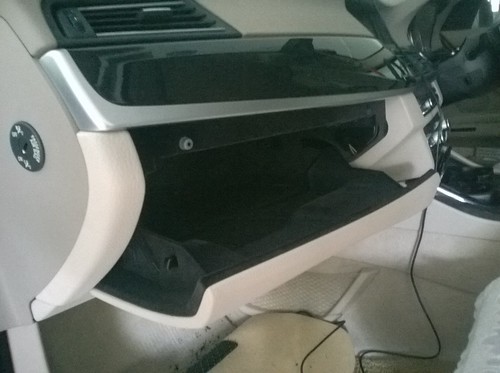
The air con filter is under the glove box. It can be accessed via the foot well area.

WP_20150829_003

To access it, three screws must be first removed. Two under the glove box, one at the transmission tunnel of the foot well area. Some guides say 5 screws. I couldn't locate the other two...

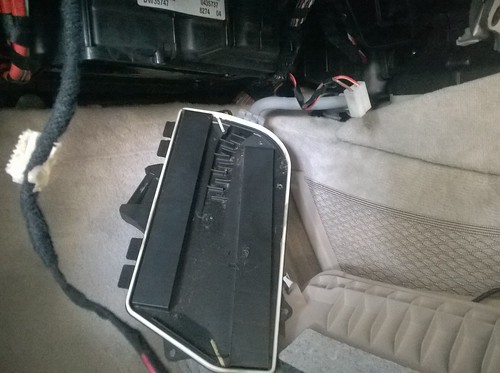
After removing the 3 screws, then pull down on the outside edge of the panel.

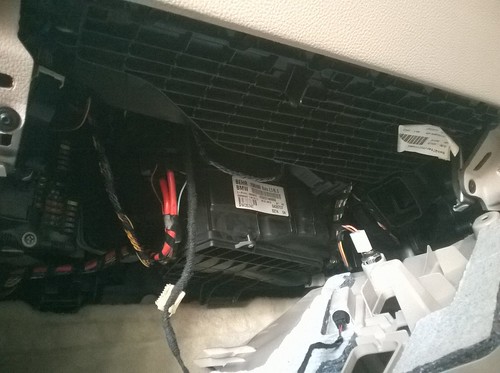
This action releases the two metal clips which can be seen on the top right corner of the below photo. After which, pull out towards yourself to release the other two hooks on the inside. (Bottom left corner of below photo)

WP_20150829_004

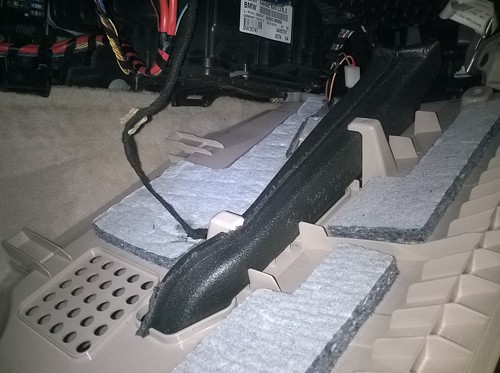
Then remove the white 12v connector socket and release the foot well light cable from the cable holder. In the photo, I had also removed the big black sponge for diverting air to the foot area.

WP_20150829_006

WP_20150829_005

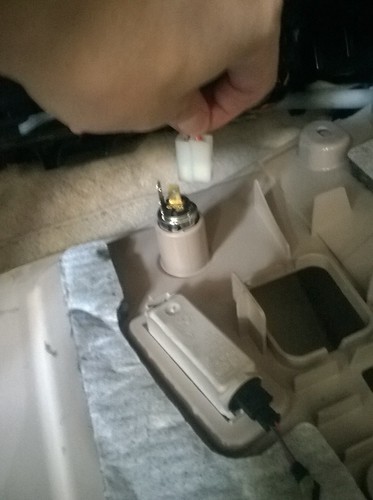
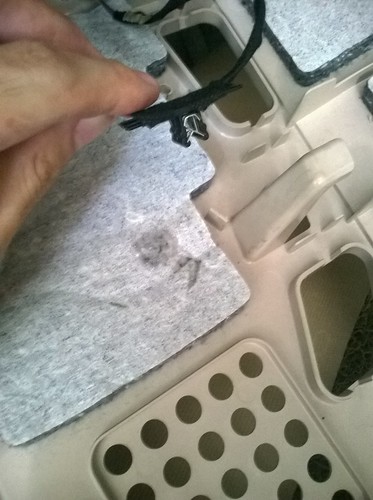
The black cable has enough slack to not require removal. After removal of the cables, turn/rotate the panel to release the flap at the end of the panel which hooks to the transmission tunnel carpet.

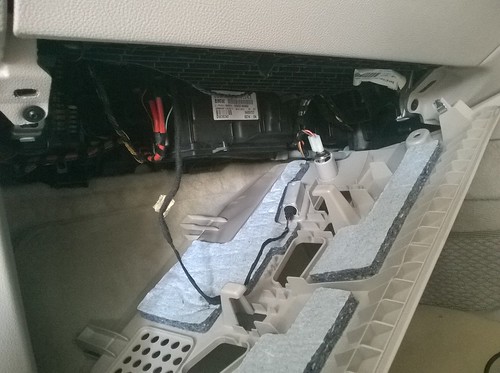
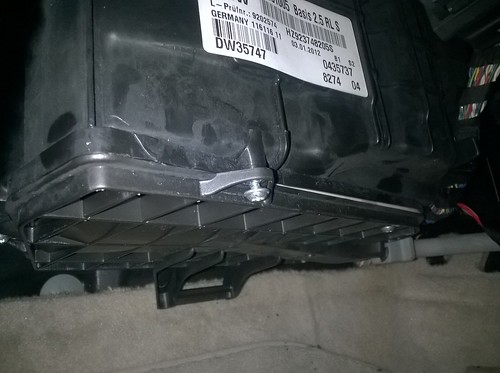
If done right, you will have full access to the air-con filter box.

WP_20150829_008

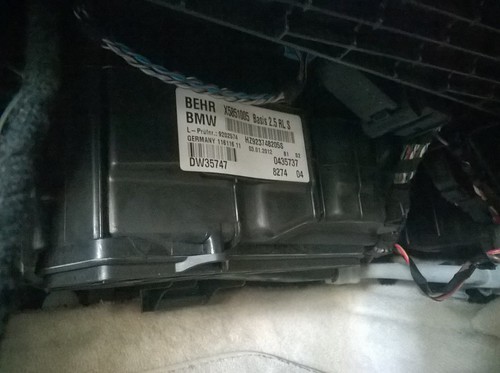
This box has 4 screws. Two are obvious, two not so obvious. Hint: One is hidden behind the white hose.

WP_20150829_007

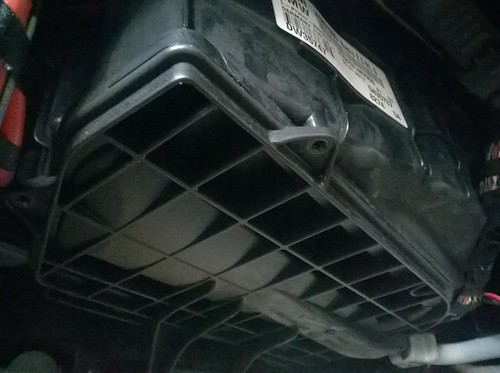
Remove the four screws and the filter box cover will be out.

WP_20150829_009

Peep under and the filter can be seen.

WP_20150829_011

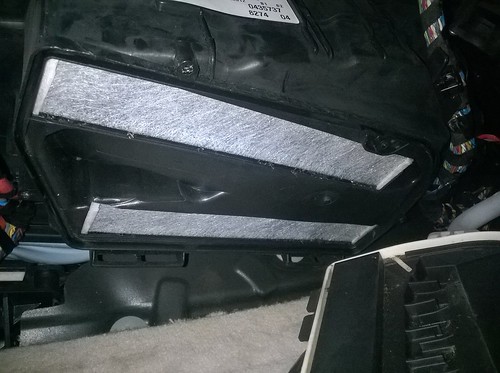
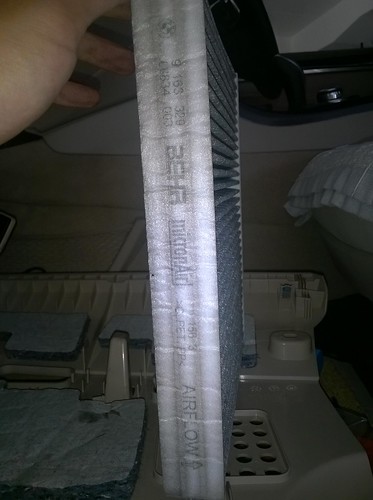
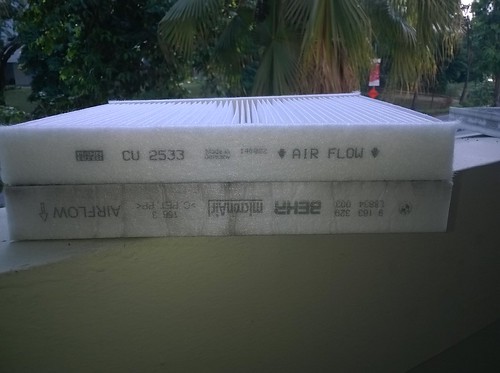
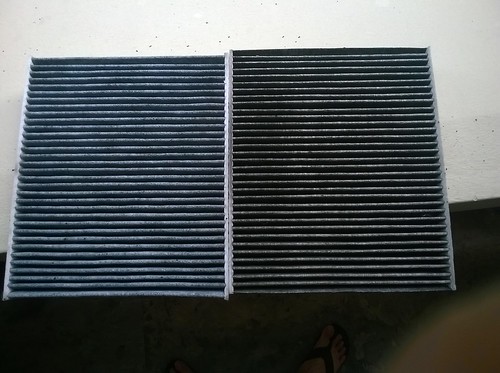
Pull the two filters out and note the direction of air flow arrow.

WP_20150829_012

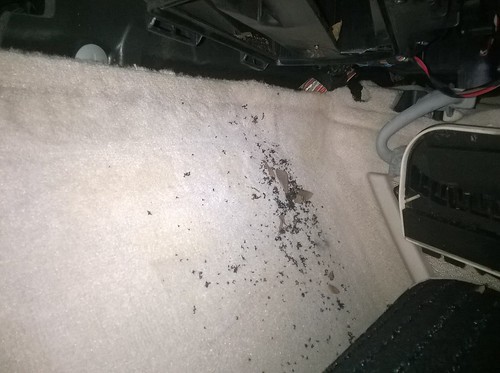
Do note that a chunk of leaves and rotten what nots are going to fall on the carpet. Perhaps a simple sheet of plastic bag could have been placed below before pulling out the filter.

WP_20150829_013

New air filter. I replaced with MANN CU2533- The plain non-activated carbon ones. The carbon ones were OOS.

WP_20150829_014

Put the filter in...and follow the reverse order of how we took things apart...

WP_20150829_015

Note the two wires and the black foam air diverter.

WP_20150829_017

Slot back the panel...

WP_20150829_018

If everything was done right, there should be no change in panel gaps and the glove box will open as per usual. Next step is to clean up.

WP_20150829_019

Now go study the micro filter and be amazed at how dirty it is. The greyish colour is the colour of carbon filter.

WP_20150829_024

WP_20150829_023

And while clearing the glove box...I found old tickets to BMW World 2014...another year has gone by. What have you achieved this year?

WP_20150829_020

Sunday, August 23, 2015

Route 185 Gua Musang road trip: Johor to Kulua Terengganu (Day 1)

Day 1: Johor to Kuala Terengganu

As it was a little rush in the morning and I was totally drained after the march across the causeway, I only started taking photo after I had "recovered"....

We took the exact same route 3 road to KT as the previous trip.

And just like the previous trip, we stopped at Mersing for lunch at about 12pm.

IMG_9411

IMG_9410

Murtabak... also ordered prata.

IMG_9408

IMG_9409

Food was great and I was really hungry because we did not eat anything in Johor.

All prata (or roti canai) were prepared by this man:

IMG_9412

By the time we reached Mersing, the fiesta had only half a tank of petrol left. So the next thing after lunch was to refuel the car and I was pleasantly surprised:

IMG_9413

Half a tank was only 14L. Worrying at the same time wondering how many times will we need to refill to reach Terengganu. In contrast, half a tank on a camry is 30L...172.5km, 14L=12.3km/L, seemingly bad FC because the car wasn't full when we got it!

After yet another 100km or so, we reached Pekan. The first thing most people do when arriving at Pekan is to go to this PETRONAS for toilet, making for occasional long queues there. What most are not aware is that just 50m further down, there is a shell petrol station.

IMG_9416

Across the road from the PETRONAS station is this big tree and some pasar malam stalls. We had durians under this big tree...

IMG_9415

Another 50-80km later and we were at Cherating Beach:

 IMG_9432

Weather was great. And once again, because it is a rental car, we could just drive up to the beach without worrying about sand/stone chips...

IMG_9433

IMG_9430

IMG_9423

Continuing on. Stopped at Kerteh for petrol. 254km. 17L. Impressive 14.9km/L...with 50/50 cruise at 80kmhr and 120km/hr. Also more than a handful of WOT red line overtaking.

IMG_9436

IMG_9435

Oil refinery stretch along the Paka stretch of route 3, which would have been epicly beautiful at night. Do note that no photography is allowed here.

IMG_9438

IMG_9437

Along the way....driving along...

IMG_9440 IMG_9441

And it started raining...

IMG_9445 IMG_9448 IMG_9449IMG_9451 IMG_9452 IMG_9454 IMG_9462 IMG_9467

Clearing up...

IMG_9469 IMG_9475 IMG_9476 IMG_9478

Stopping at the beach outside Kuala Terengganu for a photo...

IMG_9482

IMG_9503

Sun setting as we rolled into Kuala Terengganu....

IMG_9504

And after a good 500km...we reached the hotel for the night, KT Chinatown Lodge.

IMG_9508

The rear of KT Lodge is a stretch of river side shops and Pasar Malam...had our dinner at "On the Way". Food was average at best. Cheap thought just 30 over ringgit.

IMG_9509