Tuesday, December 23, 2008

Affordable P.S.U. - Its cheap, but is it any good???

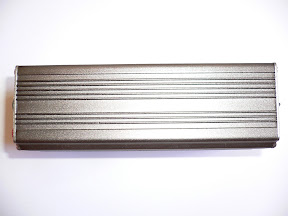
My el cheapo computer PSU converted power supply for my charger died on me more than a while ago. While searching around for a decent replacement, I found a few options, some recommended but really expensive ones and some that are affordable but relatively unknown. Eventually, I settled for a cheap chargery 12v 12A PSU, which is essentially a 12v version of the 14v PSU sold by hobbycity.


So why did I not settle for another computer PSU, since a brand new budget one could be had for $20. Its simply because for $20 more, this PSU has a pair of nice banana jacks out of the box, requires no work or modification and look pretty neat and compact compared to a computer PSU. In addition, not all computer PSUs have proper 12v output voltage. I did find one computer PSU with decent output voltage, a big 14cm fan, a sleek look with its mirror finish exterior and of modular design where you can plug or unplug the cables according to your needs, making it really neat. However, there was one problem-the price. So that stayed in my computer.

On to the "chargery power supply"...

As can be seen from the photos, the box is just a plain white box with a sticker label and the package consist of just a PSU and a power chord without a single slip of paper. Granted, a PSU is pretty much idiot proof.


As with most PSU, this power supply has a small built-in fan. While it is kinda loud, it does cool the thing pretty well. In fact, the outer heatsink casing doesn't even get warm when I tried drawing over 3amp continous. The output jacks are banana jacks, the type that you get on cheap hifi speakers and amplifiers. As can be seen, there is also a on/off switch on the unit and a green led to tell you its running. Thats all, nothing to adjust or fiddle with. Totally basic and simple.


The output voltage was over 12.6v unloaded and dropped to around 12.5v under a 2amp load. Therefore, it will be safe to assume that this unit should be able to work for most chargers around, with the exception of maybe, the more picky ones.

In my opinion, this type of PSU is more than sufficent for powering chargers doing TX/RX packs and smaller lipo packs. Personally, I only charge small 3s lipos and 2s rx packs, so it works great even when I run two chargers at the same time. For charging bigger packs like those 600/700 size flight packs, a better psu might be required.

Tuesday, December 16, 2008

RotorTech 690mm Vs Radix 710SB

In this short review, I will be comparing the Curtis Youngblood Enterprise(CYE) Radix 710mm SB edition and the RotorTech(RT) 690mm aeroflat's. The RT's that I am reviewing are the "Asia edition", which has similar specs and tip, but very different art design from the "US version". I don't know if there are other non-visible differences, but since I pay street prices with my own money for everything I review, I choose to keep that an unknown for now.

Not so suprisingly, they are made by the same people. So, how different can they be?


The art design between the ones that Century RC Helicopter Products is carrying and the ones that most parts of the world are getting are extremely different. Photo on the bottom left shows the "US edition" and the one on the right shows the "Asia edition" that is pretty popular among 3D pilots in Asia.


Similar to the US version, these are sold in different sizes of 560mm, 610mm, 690mm and 710mm. The photo above shows the 610mm and 690mm. I opted for the 690mm instead of the 710mm because I will be reviewing them using my T-rex 700N, which many prefer flying with 690's over 710's.

I choose the Radix 710mm SB edition over the Radix 690mm because the stick banger's edition are longer and yet, lighter. If only there is a Radix 690mm SB edition.

Specs For Specs

The RotorTech's are approximately 170g, while the rest of the specs off the box are...


The Radix on the other hand are not only heavier at around 175g, but also 20mm longer and 3.5mm wider.


The most obvious physical/visual difference between the two are the length and tip of the blades. Notice that the RT 690mm is using a not so conventional tip that is termed the "aeroflat" while the Radix is using a curved tip.


How Do They Compare Then???

On the same setup, the Radix gave different blade pitch angle compared to the RT's. In addition, the tracking for both pairs of blades were pretty different. This came as a suprise to me because in my past experience with blades manufactured by Funkey, you can pretty much swop blades across the different brands( Rotor Tech, Carbon Tech and Funkey) at the field and just go fly without touching the pitch curve or re-tracking the blades. Not a biggie though.

I had already been flying the Radix since I got the 700N a few months back, partly due to the positive comments about them and partly because of the popping sound and effect in one of the promos video by Align with Lukas Riva at the sticks. So needless to say, these blades really does have the "pop" in both sound and sight. Sudden stops with the radix are really good and on-the-spot. Cyclics are very snappy, precise and direct. It moves when asked to and just halt the moment you ease off the cyclic sticks. Flight speed was really fast too. However, the heli often feels overly floaty in flight and the engine would load up when the sticks are really banged.

As for the RT 690mm, collective response is equally good, but it requires far more collective pitch(12.5 on the RT's vs 11 on radix) to produce the same amount of "pop" feel and yet, it still does not have that nice sound effect that the radix produces. The cyclic felt a little different from the Radix though. While it appears to have a slightly faster overall roll rate, it just doesn't feel as instantenous and immediate as the Radix. These blades do make the heli feel just right in terms of floatiness. While they don't appear to be as fast in fff and backwards stuff, they don't load up the engine either when collective management goes bad. Autos on these are a lot more difficult than the Radix. They just don't auto too well. In fact, I thought autorotation with the RT 690mm felt more like a 50size than a 90size with light blades. That didn't suprise me though, because the RotorTech 610mm aeroflat doesn't auto too well either. The Radix on the other hand was not super good, but more than decent enough, even for someone who can't shoot autos.

VS.

Conclusion

The Radix 710SB are great for fast and big flights like most of the set maneuvers in 3DX. I found them to bite really well in windy condition.

The RotorTech 690mm are better for tight stick banging, where you rarely feel like easing off on the sticks. They are also great for someone who really bang the sticks trying to tear the heli apart in flight.

They are both great blades for 3D flight. Which is better might be just a matter of personal preference and style of flight.

Wednesday, December 10, 2008

Raptor 50 Xtreme Edition...

Well...obviously from Rcheliresource...

Some might have read the article I did two weeks back on the Raptor 50 Xtreme edition...Somehow, it got lost in the server upgrade process and so I did a repost of the article HERE.

In any case, I have continued on with the little project and finally have got everything sorted out. For those the busy ones who just want to know the results...Basically, this whole conversion is definately a worthwhile effort. It corrects the bad tendency of the stock raptor head, that is the pitching in FFF and slow roll rate. It gives a very nice feel in the cyclic, not too slow, nor too sensitive. With the new head, I can get that sort of "pop" effect that I thought was only possible on the 90 size. A lighter pair of paddles like the super stubz will make this head even better for 3D.

For the interested ones...read the full story here =>

Tuesday, December 9, 2008

The 700N is like a poshce boxster

After thinking about it for a while...I came to a conclusion. The 700N is just like a cheap, mid-engine, rear wheel drive sports car- a porsche boxster, using BMW aluminium screws. It comes sporty looking and is like a 911-wannabe, budget alternative.

It performs fine in stock form, capable enough to smoke most sedans(plastic fantastic). And for the price you pay at a Parrallel Importer, you can either choose a boxster which looks sporty or a BMW 525(evo90) with 4 doors and a really stiff suspension that your kids will complain of. Or maybe a less exciting, but equally good looking SLK(raptor 90 3D) with the engine hanging on top of the front axle- "old" conventional design, but works. Or you can pay a lot more and go for the equally capable and very powerful BMW M5(a turbulence 3D) that evolves the kitten purring in the 525 to the king of the jungle.

There are some upgrades that you can buy for a boxster, not required for a decent track day though, just like on a 700N. It comes in different form consisting of ceramic brakes, better tires and wheels, some porsche system that lowers the car and give better handling, and a useless sports chrono package. For the 700N you can get better paddles, better tail blades, metal pinion bearing block, X-stiffened bearing blocks...etc...good to have, but not required.

So all is well. You pay the price of a BMW 525, have the speed of a M5, own a car with the same badge as on the 911 series and get a car with the same engine/drivetrain layout as the million dollar super cars. What could possible go wrong?

Apparently, a lot. First off, maintence is a bitch. I am not saying the cost of the spares are expensive in any way, but the general maintence process itself is a BITCH. Its so time consuming compared to a traditional front engine car because your engine is hidden right under/behind the seat. So to change a hose or plug, you need to pretty much removing a million other things, just so unforunately, like on the 700N. Too time consuming, I might add. Just go try changing the clunk or removing the engine in a 700N. Exluding the exhuast, you will need to remove 14screws on a 700N to drop the engine. On a raptor? 4.

And the screws. In order to save weight, Align choose to use some useless, button head screws made of frozen butter which strip ever so often. Just like on a car using Aluminium bolts to save weight, you can choose to either replace them when you get it out the first time or face some other issues the next time round. So whats the issue here? Just some screws, surely they can't cost much? Well, it just so happens that those are not the generic screws...

Then why are owners of the super duper expensive super cars(or expensive helis) with similar concepts and design not complaining like I am? Simply because when you reach the stage of being able to afford those, it won't matter if changing a hose or plug cost 5 man hour. It wouldn't matter if you have to change the whole assembly because one part of it is not quite good. Anyway, you don't do the maintence work, do you? Anyway, who drives the same supercar everyday?

Saturday, December 6, 2008

Realflight G4.5

Needless to say...this is off rcheliresource again...

The Realflight G4.5 update have been out for a while. Just got mine updated a few days ago and it was a big file at almost 1gigabyte. As with previous upgrades, most of the changes are more on the visual and sound effect, rather than the physics or "realness" of the flight. However, I did discover a slight change in heli flight characteristic.


And the minor change in heli is the auto rotation capability. Gone is the unrealistic and overly easy autos. Now the helis auto with practically no reserve in the blades and to be honest, its even harder than the real thing.

In addition, the helicopters are now a lot more boggable. While it doesn't simulate a boom strike, the power of the helicopters feel a lot more realistic now. And that in itself presents a new problem. You will need to go back and re-tweak your old models if you had previous adjusted the power to feel like the real thing.

One of the new visual effect for G4 was the bloom effect. G4.5 take it to one step furthur with a Depth of View effect. One thing to note though, you will need a decently fast computer with a decently powerful graphic card to get decent frame rate with all these effects on. I suppose something along the line of a 2.6+ghz duo core with a geforce 8800gt should be sufficent...but no gurantee.

Since my computer has neither a fast processor nor a fast graphic card, I left my video in the bare basics. In my opinion, this new depth of view is just like a camera lens focusing on just the part that you want to focus on and blurring the rest of the background. Not into photography, but I think its called macro mode in cameras and the background is termed "bokeh".

Anyway, I took a few snapshoot to show the difference.


Plane with bloom and DOV on.


Bloom+DOV


No effect

Night Flying


Glow only


No effect


DOV+Glow. Note the focus is the "House of Horror"


DOV+Glow. Note the focus is on the plane.

There is also this new feature called "difficulty". It comes in 3 levels-"Beginner", "Intermediate" and "Advanced". Not sure what it stands for though.

Since I am not a plank flyer, I shall not go into changes made to the plane section. However, I did include a short flight video in the plane section of the video. Note the sound you get when the plane touches the ground, that is one of the new feature of G4.5.

And the video. Pretty low resolution for now. A high resolution might be posted in time to come...anyway, pardon the limited flying ability...just a weekend stick-banger here.


All in all a decent upgrade, definately worth the 1GB of bandwidth, considering that its FREE.

Update: A slightly higher resolution video of the HELI PART. Click HERE to open it for larger view.


Realflight G4.5 Heli from Calvin lin on Vimeo.
P.S. Since mine is the friendly version...its not always up to date.