Funkey FG white hollow core 550mm
They were smooth and predictable blades, but because I was only running +/-10 back then, I always thought they were weak and was not loading my engine up enough. Very smooth in flips.
Funkey FG silver 600mm
Smooth blades, but wasn't that fast on the cyclic and the punch was quite weak with the stock raptor pitch window. I am sure they can do better with more pitch, but I didn't had the mechanics to fully exploit its ability when I still had them. Went through quite a few pairs of them and finish was always perfect.
 Unforunately..this ugly photo is the only photo I have showing the whole blade...note the shiny new hatori #522, I was already using it back when the JK hatori and MP II was COOL, simply because it was the cheapest of the lot...
The World Models 550mm
EXCEPTIONAL PUNCH AND STRENGTH. Although many flyer who bought the blades later complained that theirs are not tracking and balancing, mine(I assume from first few production runs coz I got them the moment they were introduced) was perfect. It was white in colour and was quite stiff. It made my raptor 30 so good that I could flip at eye level back when I had the raptor 30, something which I wouldn't dare to do with even the raptor 50...with this blade, a tt36, a noisy hatori 222 and pro-glow fuel, it impressed quite a few flyers and I am talking about 60/90 size flyers...
Some unknown Brand CF 550mm I got from the LHS
I suspect its FG, though I was told its CF. The shop assistant who is a pretty good flyer used them also. Never crashed them to know how is construction like. Didn't fly a lot with them either. Worn the gel coating at the root area off and it exposed some black CF pattern, but they still look FG to me.


 2. The carb rotor should fall off, take note of the little spring.
 Unscrew the Main needle and take out the spring retainer that holds it.
 4. Undo this little nut.
 5. Push as in the direction as shown in the photo. Don't pull or turn, it doesn't work. Took quite a while to figure out that...BTW, it requires quite a bit of force because there are two rubber o-rings inside holding it, so PUSH.
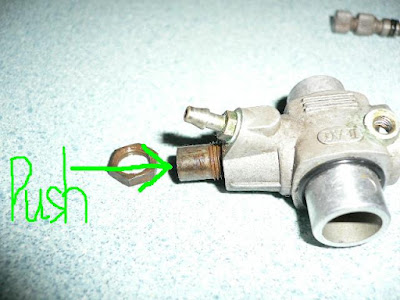 6. DONE! Removal of the inlet nipple is kinda optional, I feel.


